
Features:
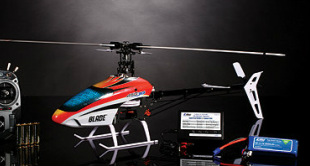
*The Blade 450*
Well now you've come to features, the part of RC Helicopter selection that is the most confusing! That is why I started with the other decisions first, so that this step could be much easier.
Of note is the fact that this page is tailored to potential CP Helicopter Pilots, although coaxial and FP pilots will still get quite a bit out of this page.
I will categorize features into 3 Groups: Important, Semi-Important, and Extra. Obviously all of these features are not required to have a workable Helicopter, coaxial, FP, or CP, but the features on this page are ranked in the order of significance.
Important:
|
Semi-Important:
|
Extra:
|
Important Features:
Symmetrical Airfoils work just as
well upside down as right side up
These are the features that are most important to have on a helicopter, though not strictly necessary.
Auto-Rotation (Auto) Capable:
Click on Auto-Rotation to learn what it is. Basically it is a way of saving a helicopter that either loses tail or main engine power. It is only available on CP Helis.
Small Micro CP Helis (under 12" rotor diameter) often don't have it, though, because they are so small and thus a drop is less likely to cause significant damage (although I still believe they should have this feature).
For larger RC Helis, though, this is a life saver. Well what if I keep all your Battery / Charging Tips you say? These will drastically reduce the chance of needing to perform an auto rotation, but not entirely. There is still a chance something can go wrong, such as the tail hitting something, a motor burning out, a battery dieing much faster than normal, etc. Plus, once you start performing acrobatics (which more than 90% of CP fliers do) you'll need to know how to auto if you run the battery out too fast doing power-hungry maneuvers. Plus, auto-rotations are cool looking. Auto-Rotation Capability is probably the most important feature you can have.
Inverted Flight (Symmetrical Airfoils):
Being able to fly inverted (upside down) is one of the biggest differences between real and RC Helicopters. It is also one of the most common features of a CP RC Heli. In short, I would not buy a CP Heli unless it has symmetrical airfoils. If a heli does not have symmetrical airfoils it is probably either Fixed Pitch or junk (or possibly very accurately scale; not something I'll get in to). Basically, if you want a collective pitch helicopter, be sure it has symmetrical airfoils.
Tail Rotor Type:
One of the biggest things you should insist on when getting a new helicopter is solid tail hold. This means that the helicopter will stay pointing in the correct direction. If you have a HH Gyro, this should always be where you last left the tail, but if you have a YR Gyro this will be a tail that is consistent.
There are three main types of tail rotor control: electric, belt, and shaft drive. The real choice is between electric and belt/shaft, because belt and shaft are very similar. Electric tail rotors basically have a separate motor for the tail rotor that is fixed pitch; that is, it speeds up or slows down to turn the helicopter. These types of tail rotors work best when the torque developed by the main motor / rotor is constant.
A belt/shaft drive tail, however, is one in which the power of the battery feeds only one motor, which transfers some of its power to the tail via a right angle gear. On the tail propeller, variable pitch (aka collective pitch) blades can be manipulated by a servo to increase or decrease tail rotor thrust, thus controlling turning. In essence, as long as you have power, the tail rotor hold will be good. By the way, if you are not an advanced 3D pilot, stick with belt drive because it is cheaper and more forgiving in crashes.
The best advice is to avoid an electric tail rotor! They always blow out and by definition have worse tail hold. However, if you get a micro size heli, an electric tail rotor is workable. Don't get a larger CP helicopter with an electric or fixed pitch tail rotor, it is junk. If you can afford it or are getting anything but a micro heli, go with a shaft/belt driven tail.
Semi-Important Features
A mid-sized battery
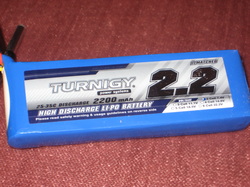
Battery size:
This is a good indicator of how powerful your helicopter is. In general, a larger voltage Lipo battery is on a larger heli, but among the helis of that size there are often several different battery sizes in use. You cannot change the voltage to a helicopter, but you can choose a helicopter with higher or lower voltage. In general, this in not a choice that you will really care about, but I just felt I should mention that in general, larger-voltage-battery RC helicopters are more powerful.
Servo Speed:
This is how fast the servos will respond, and thus cause the heli to respond. A faster speed will be a more responsive helicopter.
When you are first learning, you can save money by not going for top end servo speed. Yes, you want fast response times and quality mechanics, but don't go over the top and get a professional grade heli.
Number of Ball-Bearings:
The ball-bearing count of a helicopter is somewhat relative, but in general it determines how precise the helicopter is. A higher number of ball bearings is more expensive, but due to the precision available with ball bearings your helicopter will respond more accurately this way.
If you are a beginner, then please do not search for a high ball-bearing count helicopter. Find a quality heli that is best for your needs.
Motor Type(s):
The type of electric motor on your RC helicopter (and its tail rotor, if applicable) also defines how powerful the helicopter is. A coreless motor is the least efficient type of motor, with a brushed in the middle of efficiency and a brushless motor the best type. Coreless also lasts the shortest, both in lifetime and power wise before burning out; brushed is second best, and brushless once again the best. If you can, get a helicopter with a brushless motor because the motor lasts the longest and is most powerful. Otherwise, you will probably end up converting to brushless anyways (and wasting some money).
Body Material:
The material that a heli's frame (the part on which mounts the motor, servos, PCB, main rotor shaft, receiver, etc), skids, tail boom, etc are made of. Carbon Fiber is generally preferred, as it is lightweight and strong. However, aluminum is also very sought after because it is stronger, with many helis offering aluminum upgrade kits. On the other hand are lower quality materials such as plastic. Likely, you want carbon fiber or aluminum body parts, if possible. However, micro and sometimes small helis work fine with a bit of plastic. Plastic and other low quality materials may be cheaper, but you'll spend much more in the end when you upgrade your heli to carbon fiber or aluminum or get a whole new heli altogether, one that doesn't break as easy. I wouldn't recommend upgrading very many parts to aluminium.
Gyro Type:
There are basically two gyro types: HH and YR. By far the most common, at least on CP Helis, is HH. Click on either term to get its definition. HH is better, but more expensive. I would probably go for a HH Heli as YRs are very uncommon now, and also because they are easier to learn on.
Extras:

These are features that are nice to have, but totally unnecessary.
Flybarless:
Flybarless helis have a lot of hype right now, but realistically, when you are learning you don't need a flybarless heli. Flybar Helicopters have always worked for beginning up to advanced 3D (though flybarless helis are slightly more capable 3D machines), but for the average pilot flybarless will just be harder to learn on. Now granted, many micro and small CP Helis are only available flybarless, to save on the weight of a flybar. The best recommendation for your first CP Heli, however, is slightly clouded; there are many good reasons to go with a flybar and just as many to start out "flybarless."
Flybarless helis are sought after because they have a simpler rotor head (which means easier heli maintenance and repairs), more power per battery (because they don't have a heavy flybar and have less aerodynamic drag), get less damaged in crashes (because they don't have a big spinning metal device), and are more responsive than Flybar helis. However, half of these features are not what a beginner CP flier worries about when learning, and thus the justification for the added expense of getting a new flybarless head (often costing more than $100 on larger helis) is often hard to find.
On the flip side, however, flybar helis are going out of style and a few years down the road it may be hard to get replacements for broken or worn out flybars. Helis that used to come standard as flybar now are beginning to be available flybarless without having to purchase a separate flybarless rotor head and thus waste the flybar head. Also, many helis as I said are beginning to come standard flybarless. So where do you draw the line?
It all comes down to money; if a flybarless heli is more than about $50 than a similar-performing flybar heli, then at least for a beginner it makes sense to stick with the flybar heli (this is very frequently true with 400+ size helis). If you are more advanced, still look at the price difference to see whether flybarless is worth it to you. As I said above, flybar worked fine with advanced acrobatics before flybarless systems and still does today.
Extra Channels:
This would consist of a heli with a receiver with more channels than needed to fly it (generally more than 6 channels on a CP Heli). This would be needed to have features such as retractable landing gear, flashing lights, laser tag, etc.
Rescue:
A relatively new idea is a rescue (or SAFE) feature (I believe only on a select few Helis). Basically, this a VERY nice feature that automatically levels the helicopter and tells it to ascend, whatever orientation it was previously. This is especially useful when learning acrobatics (DEFINITELY) so that you don't have to repair your heli as much.
Swashplate Type:
There are 3 main types: 90 Degree, 120 Degree, and 140 Degree. Basically, 90 Degree is never used because the servos tend to fight and wear each other out. 120 Degree Swashplates (where the servos are mounted 120 degrees from each other) is the most common design. It has either two servos in back and one in front or two in front and one in back. I'll explain 120 Degree configuration with the more common type, 2 in front and one in back. To go forward, the two front ones move the swash down and the back one moves it up; backwards movement is just the opposite. To go left, the right servo moves up and the left one moves down.
140 Degree Swashplates are newer on the scene and offer better overall control by using an angle of 140 degrees between two of the servos. They control movement in any direction in the same way as 120 Degree swashplates.
When you are programming your helicopter into your radio, be sure you program the correct swashplate type or the helicopter won't fly correctly at all. Be careful; several flybarless helicopters (the mCP X in particular) have the flybarless system do the hard programming work. These systems are programmed into your radio as 90 Degree even though they really are 120 or 140 Degree swashplates.
On / Off Switch:
This is just a nice feature to have, but comes standard on very few helicopters because it adds just a bit of extra weight. It is basically a way to plug in the battery but still have the helicopter off, and then turn it on with the simple flip of a switch. This saves the need for extra care each flight to plug in the battery without bumping the helicopter so it can calibrate correctly.
