
Lesson 1: Pre-flight Setup
This seems like a pretty useless lesson, given that most coaxials and FP helis come RTF, but following this lesson's plan will put your helicopter in top shape for flight. For most people, this lesson takes less than half an hour at most, and more like 10 minutes. This is a great lesson to do while your battery charges.
Okay, so you just got the box and opened it. Feel free to admire the looks of the heli for a little while first.
The heli looks fine, then lets move on to examining the controller, also known as the radio or transmitter. For the 9053, the controller needs 8 AA batteries, inserted at the back. Make sure the controller turns on, then turn it off and get a feel for the controls for a minute. When flying, you will only need to perform small control movements, so get used to the resistance of the two knobs.
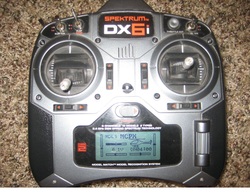
The RC Radio
On 3 channel controllers (such as the 9053), the right stick up and down movement controls forward-backward movement. This is either via a vertical tail propellor (on some 3-channel coaxials) or a swashplate (on others). It also controls left-right turning with a left and right control movement. The left stick up and down controls throttle, or how fast the two main rotors spin. Loosely, throttle determines height because higher throttle creates more lift.
On 4+ channel controllers, the right stick up and down still controls forward and backwards cyclic movement, but always via a swashplate. Side to side on the right stick now generally controls left and right cyclic movement. The left stick side to side now controls left and right turning, with the left stick up and down still controlling height via throttle. |
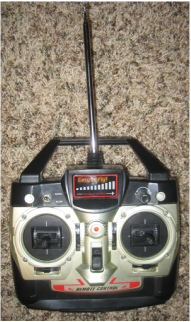
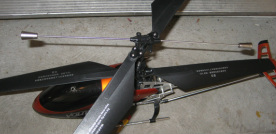
The 9053 radio
|
Checking the Center of Gravity:
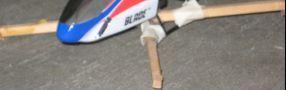
Hold it like this to determine Center of Gravity.
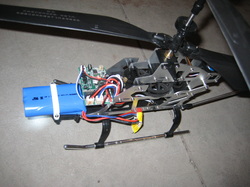
After you're sure that the controller works, check the center of gravity.
Center of gravity is important because it determines what the
helicopter naturally tends to do. To check the center of gravity, place
the battery in the tray holder and place any securing pieces in the
correct spots (in the picture above the battery is properly installed).
However, do not secure any screws because you will be moving around the
battery to determine it's "sweet spot." Place the cover over the canopy
in its natural position. Then, if you have a coaxial, put the lower blades fully extended in the
blade holder and turn the gear until one blade is directly over the
front and the other directly over the back.
For both types of helis, then turn the top blade gear until the flybar (the big bar over the top blade set) is directly over the front and back. Then balance the top blades in the blade holders so that the flybar is level (for FP helis the flybar is generally rigid), so this is not necessary). Then turn the blades so that they are over the front and back, as with the lower rotor above.
Now pick up the helicopter by the middle of the flybar, the part directly over the gear shaft. Then lift it a little above the surface of the ground and see how close to level the skids are. The heli should be close to level or a little tiny bit front heavy. After all, you want the heli's naturally tendency to stay put, not move around. If the heli's center of gravity is not level, then adjust the battery pack either forward or backward to level it out. This will take some trial and error, but its important, so take the time to do it.
Now fix side to side imbalances. You may need to tape a paper clip to one ski to fix this. Again, trial and error will help you figure out what weight (perhaps a third of a paper clip) yields the ideal balance. Obviously, a perfect balance is practically impossible and unlikely unless you balanced your blades perfectly, so get as close as you can.
To 90 Degree Flybar Heli owners:
Please note, this is tailored to people with a 45 degree flybar, such as that on the 9053 Volitation and most coaxial and fixed pitch helis. Owners of a 90 degree flybar will have to center the flybar side to side instead. I have yet to find a coaxial or FP heli with a 90 Degree Flybar, but I thought it worth mentioning.
Training Gear:
 My homemade wood CP training gear.
Before you begin lesson 2, it is a good idea to think about getting some rc heli training gear. Although not too important for 3 channel helis (I learned without them), helicopters with 4 or more channels do need them to avoid a blade strike with the ground when moving to the side.
|
|
Think of it like riding a bike: you can learn without training gear, but you are more likely to fall and scrape your knee (read: scratch or break your blades). I would advise against buying a pair though, because they are very cheaply made and it is much easier to make your own pair. Check out the movie to your right to see hammydude12345 show how to make inexpensive rc heli training gear.
On to Lesson 2:
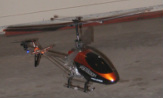
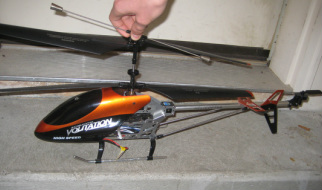
Ready for first spin!
Now that pre-flight setup is good, you are ready for your first flight. Good luck on Lesson 2: Ground Exercises!
