
Lesson 4: Circles, Figure 8s, and Control Reversals
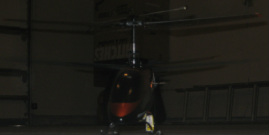
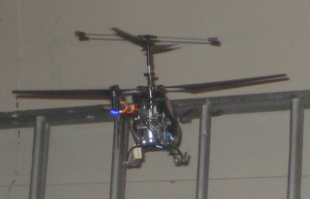
A nose-in orientation.
After learning basic helicopter control in lesson 3, you are ready for some simple aerobatics.
Today's goal is to learn how to control your helicopter with its nose closest to you, then make circles and figures 8s. This is where control over your helicopter becomes more important to avoid damage, so keep practicing until you have mastery of these exercises and you'll avoid crashes.
Once again, as in lesson 3, it will likely take days, even weeks, to master this lesson, depending on your innate skill, batteries, and flight time per battery. Don't hesitate to finish this "day's" lesson plan at your own pace. I can't stress enough that you shouldn't rush this lesson!
After a range check, establish a nice, 6 inch hover.
Setup for Circles:
Move your heli to a place where you can maintain a 2-3 foot hover with 5-10 feet of free space in 3 directions. Depending on the size of your area, you might have to be very near a wall on one side. Turn the heli to a tail-in position, facing an open side with an open side in back and to the right side.
Cyclic Circles (for 4+ Channel Helis only)
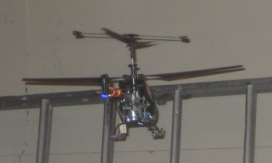
A reverse circle in progress.
If you have a 4+ channel heli (left and right movement-capable), begin by pushing slightly forward on your cyclic stick. As the heli moves forward, begin to decrease forward movement and increase right movement. Then change wholly to right movement to complete 90 degrees of you circle. Without stopping, begin to decrease right movement and increase back control, then just move backwards to complete 180 degrees. Now go backwards and to the left, then just to the left, then forwards to the left, and finally just forwards to complete your circle.
If you are the average flier, the circle you just traced out looked like a deformed watermelon. But don't give up; keep practicing this movement until the circle looks better and better.
Now do the opposite: begin by moving backwards, then to the right backwards, then to the right, right forwards, forwards, forwards left, left, left back, and finally back. This is a reverse cyclic circle. Practice it too until it is . . . well, a circle.
You will notice in completing these circle that the cyclic (right) knob makes a circular path around the neutral position. Hence, a "cyclic circle."
Directional Circles (all helis)
Now its time for a more challenging circle. To begin, push very slowly to the front and right turn. This will cause the heli to move in a curved line which eventually ends back on itself.
The tricky part with this circle is that it is harder to correct for. If you apply too much forward command without enough turn, then the heli will make a very large circle (which will likely have you end up with a crash into the wall). If you have too much turn, though, the circle will not really be noticeable. The key is to be almost exactly even with your turn and forward control. Make a nice, 5-8 foot circle.
An important note is that you don't want to change just one portion of your circle command; doing so will cause the helicopter to do 2D loops. If it does begin to loop, then slightly increase your turn command on the side of the circle that is advancing towards the center (not the side that is drifting away from the center of the circle). Basically, circle flying is not like other types of FP (or coaxial) flying: usually you can't just hold down the control combination the whole time. Rather, you will likely have to frequently increase or decrease your turning or forward speed.
You will probably have to do this many times before you get the hang of how much of each control you need to use. Take your time and don't get impatient; with practice, it will become more second nature and you will be able to do it on demand.
If you mastered a forwards-right directional circle then try it forward and to the left. You should end up moving the turn control the same distance as before; otherwise, you have a centering issue on your controller that needs to be fixed (see Lesson 2 for how to do this). After mastering this, try both a left and right backwards directional circle. This kind of circle is related to a funnel, the only difference being a higher speed, greater horizontal tilt, and movement to the side rather than backwards.
Changing the Shape
Now begin to vary the size of the circle by slowly increasing both turn and forwards / backwards movement. If you do this gently enough, the circle will increase in size without turning into a 2D loop.
Try to shrink your circle until it is very small and fast. Then widen it to 20 feet, or as wide as your area will allow. Keep practicing to make these circles smooth and don't hesitate to cut the throttle if you think the circles are getting out of hand. Circles are very important to master to unlock the full potential of a coaxial or flixed pitch heli, but they are also very difficult, so don't push the limits more than is absolutely necessary at this stage. The key is to become absolutely proficient in controlled, 2D flight in the air.
Try to shrink your circle until it is very small and fast. Then widen it to 20 feet, or as wide as your area will allow. Keep practicing to make these circles smooth and don't hesitate to cut the throttle if you think the circles are getting out of hand. Circles are very important to master to unlock the full potential of a coaxial or flixed pitch heli, but they are also very difficult, so don't push the limits more than is absolutely necessary at this stage. The key is to become absolutely proficient in controlled, 2D flight in the air.
Figure 8s:
Now we really start getting complicated. Begin by performing a slow, small directional circle with a diameter about 1/3 of your area or 10 feet (if you can). Stop moving at the same location you started after completing it. Now, start again with another circle about 5 feet wide, but this time turning in the opposite direction. Once again, stop in the same place you started.
What you've just done is an abbreviated figure 8. Once you are proficient in this "stop and go" figure 8, take out the pause in the middle and link the whole movement together.
After you complete an entire figure 8 without stopping, continue on with another one, trying to trace out the exact same path each time. Then work on a smaller figure 8, a reverse figure 8, and a cyclic figure 8 (if you have a 4+ channel heli). All you have to do is connect two circles at one point. You'll find they are not too difficult, if you've mastered a circle.
Well done! You passed 2D control. On to height control and pinprick landings in Lesson 5.
