
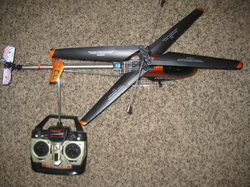
9053 Mods and Upgrades!

This page is chock full of modifications and videos on how to modify and / or upgrade your 9053 Volitation to get the most out of it. Check these upgrades out!
First my own detailed upgrades (which cost less than a few cents), then my analysis on the effectiveness of each upgrade, and finally some youtube videos of other 9053 fliers and their mods and upgrades.
First my own detailed upgrades (which cost less than a few cents), then my analysis on the effectiveness of each upgrade, and finally some youtube videos of other 9053 fliers and their mods and upgrades.
Check out my 10 Cent Tail Upgrade!
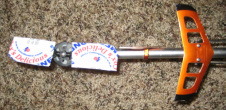 My amazing new butter tail rotor!
I've increased forward thrust drastically by doing this cheap, simple mod. I just cut two, flat rectangle sections out of the lid of a butter container and taped them on (see the picture to your left) SECURELY.
They were very lightweight, which is key on the tail propeller. I can now fly into the wind with my 9053! I've even flown outside in 10 mph+ winds without casualty. |
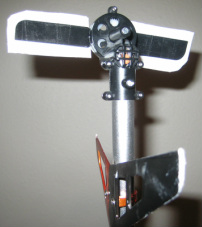
The bottom of my butter tail rotor
|
Ventilation Improvements:
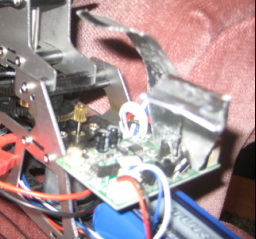
Once you add a higher mAh battery, the older version of the 9053 overheats. The newer version may as well (but I don't have one, so I don't know). This is a fairly simple mod to almost entirely eliminate overheating.
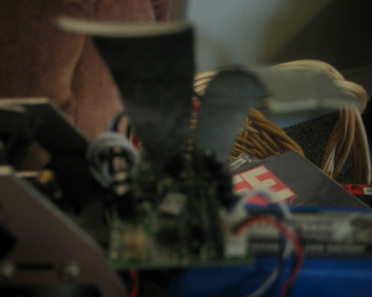
All you need is an aluminum type can (I used an old tuna can), a sharp knife, and super glue. First, cut out two long strips (about 1.5in long, ranging from about 1in at the top to 1/4" on the bottom) from the metal can with your knife. Ooh, careful, don't cut yourself! Try to make them the same size. Then, simply glue the small bottom of each to the existing heat sinks on your circuit board with super glue, taking care to only put glue on the heat sink metal surface. Also, make sure that the heat sinks do not touch each other. If you put glue on any other surface it could potentially short your PCB.
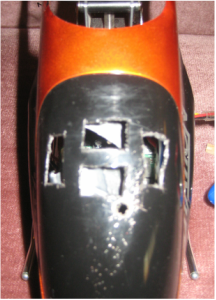
You will also probably want to cut ventilation holes in the canopy to increase heat dissipation even more. Just be sure to cut them so that your new heat sinks are near the opening. If you want a guide, see the picture below. After the glue on these heat sinks has dried (a few hours), then take her out for a spin and see the difference!
All you need is an aluminum type can (I used an old tuna can), a sharp knife, and super glue. First, cut out two long strips (about 1.5in long, ranging from about 1in at the top to 1/4" on the bottom) from the metal can with your knife. Ooh, careful, don't cut yourself! Try to make them the same size. Then, simply glue the small bottom of each to the existing heat sinks on your circuit board with super glue, taking care to only put glue on the heat sink metal surface. Also, make sure that the heat sinks do not touch each other. If you put glue on any other surface it could potentially short your PCB.
You will also probably want to cut ventilation holes in the canopy to increase heat dissipation even more. Just be sure to cut them so that your new heat sinks are near the opening. If you want a guide, see the picture below. After the glue on these heat sinks has dried (a few hours), then take her out for a spin and see the difference!
|
|
|
9053 Battery Upgrade:
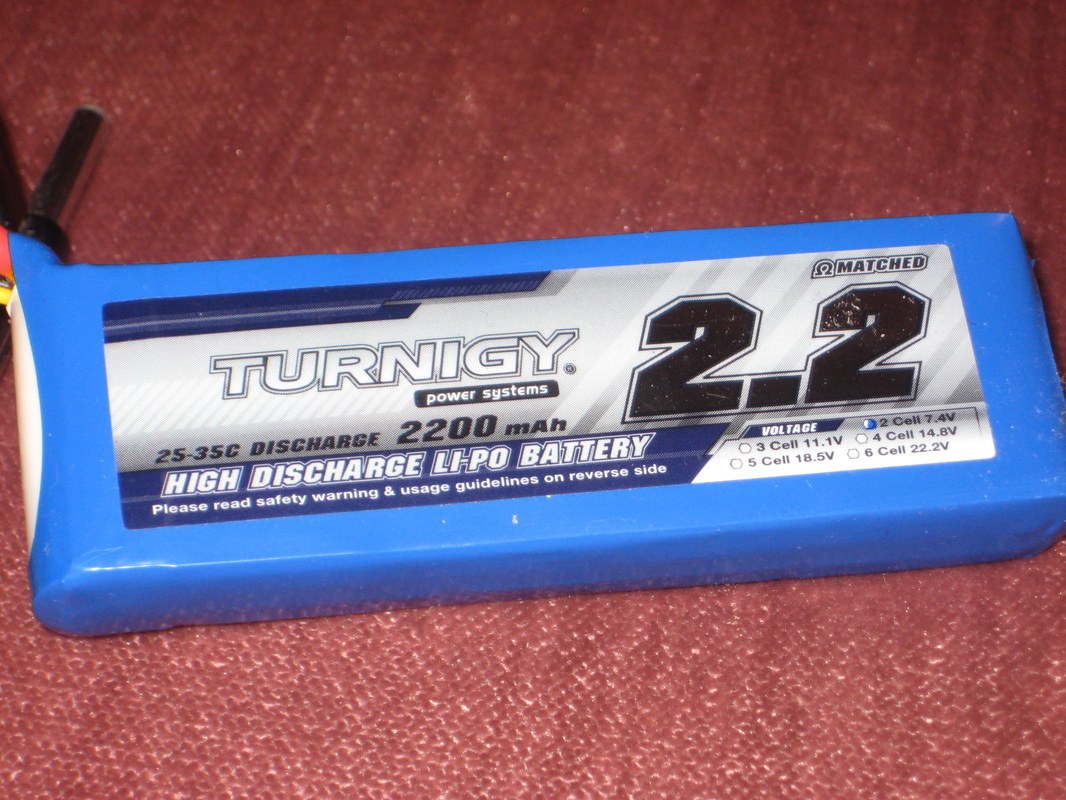
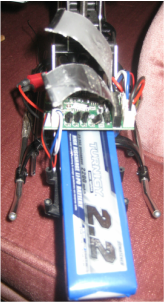
This is the battery I bought to replace my ailing stock battery. I get much longer flight time (nearly double) with it. It is a Turnigy 7.4V 2200mAh lipo battery with a deans connector, so I've replaced the jst connector on my heli with a deans. Total, including the dean replacement and shipping, was about $26.00, not a small investment for a $50 heli. However, I should get about 400+ flights with this, compared to the 60 flights on the $12 stock li-ion battery, using my lipo battery tips.
Obviously this battery is not perfect for everyone; to help with the selection process for your own new battery I am supplying the figures of the stock 7.4V 1300mAh Li-Ion battery as well as my Turnigy:
Obviously this battery is not perfect for everyone; to help with the selection process for your own new battery I am supplying the figures of the stock 7.4V 1300mAh Li-Ion battery as well as my Turnigy:
Double Horse Li-Ion Battery:
Voltage: 7.4V (2S)
Capacity: 1300mAh Constant Discharge: Unknown (probably 12-15C) Length: 2.7in (68.6 mm) Width: 1.5in (38.1 mm) Height: 0.6in (15.3 mm) Weight: 3.5 ounces (100 grams) Charge Plug: JST-XH Discharge Plug: JST Average Flight Time: 8-10 mins |
Turnigy Li-Po Battery
Voltage: 7.4V (2S)
Capacity: 2200mAh Constant Discharge: 25C Peak Discharge (10sec): 35C Length: 105mm Width: 33mm Height: 17mm Weight: 138g Charge Plug: JST-XH Discharge Plug: Deans Average Flight Time: 12-15 mins |
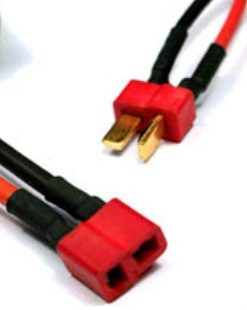
Deans Connectors
|
The maximum length for a new battery that I've found fits in the canopy is just over 107mm; even that is a close fit. It also depends on the height and width of the new battery.
I've been able to fit my Turnigy into the Canopy without any modification.
I've been able to fit my Turnigy into the Canopy without any modification.
My Upgrades:
These are upgrades on my 9053 that I have done. As such, I can personally testify that these are viable and useful to get the most out of your 9053:
A smooth throttle stick: By removing the clicks on the throttle stick, the stock controller acts more like a higher-end radio and less like a toy one. I'll get more details posted soon on this simple upgrade.
An Expanded Tail Rotor: With my 10 cent tail upgrade, I've nearly doubled forward thrust without adding significant weight to the tail rotor. As of yet, the increased weight hasn't killed my tail rotor, in large measure because of the low weight of the plastic I used.
Lower Rotor Reversal: Use the video below to accomplish this feat easily. This mod makes a blade strike between the two main rotors almost impossible, saving $$$ from replacing the blades. I have flown without this mod without damage, but I have had some mild strikes when doing so.
A Higher mAh Lipo Battery: I bought a Turnigy 7.4V 2200mAh Lipo to replace the stock 1300mAh Li-Ion and I feel it greatly increased my flight time. Without Ventilation and heat dissipation improvements, however, this will burn out your motor! That is why I added . . .
New Heat sinks / Ventilation Improvements: This, I feel, has saved my motors from burning out anymore. Now I can get about 12 - 15 minute flights without over-discharging my battery or burning out my motors!
I have not replaced the flybar; if you do not drastically change the throttle, then this mod is not required, in my opinion. Still, if you have the money or the desire, this mod will help avoid damage.
This is the best Lower Rotor Reversal for the 9053!
|
Check out this video: This is the simplest 9053 lower blade swap there is; don't mess with the complicated other methods out there. Just be careful not to strip the screw holding the gear on . . . if you don't fully unscrew it (but enough to get the gear off) then it is easier to do this mod as well. I know this from personal experience . . . :) |
|
Youtube 9053 Mods and Upgrades
|
|
This movie explains:
This is a second movie by hammydude12345 which goes over much of the same info as the first, only with different explanations. I've found bits of it helpful over the first movie (above), such as
This is a longer movie and it goes over much of the same information as the above, except for:
This video is much the same as the others, except for:
|
