
Lesson 5: 3D Flight
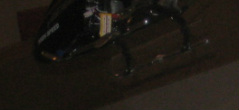
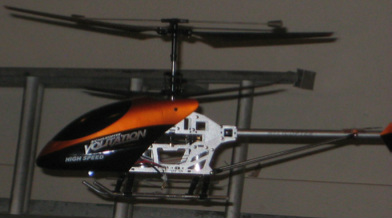
Coming down . . .
Today's lesson is all about altitude change during flight. In this lesson you will learn how to control your heli's altitude and make pinprick landings.
Altitude Control
After flying for a while, you will become more and more comfortable with lower-level flight. Now is the time to learn throttle corrections to enable you to fly level in forward flight and hover higher than ground effect will self-stabilize.
To begin, establish a nice hover at roughly 2-3 feet off the ground. Now, slowly increase the throttle until the heli continues to rise and does not self-stabilize. As it raises in height, slightly decrease the throttle so the heli begins to descend, then let it settle back into a lower-level hover again.
The purpose of this exercise is to show how controlling altitude with throttle is cumbersome and requires thinking ahead and constant correction. If you decrease throttle while the heli is going up, it takes a second or two for the blades to slow down and the heli to sink. Then if you see the helicopter going down and overcorrect with much more throttle, the heli will rise too fast, necessitating a large decrease in throttle, etc.
The secret to height control is small, frequent throttle corrections. Keep the control input changes small and err on the side of too small corrections. If you are practicing inside, however, make sure you err with too much throttle decrease over too much more throttle, because then you'll smack the ceiling - not a good idea :)
Mastering Height Control
Now repeat the exercise above, this time trying to keep the helicopter at the same altitude. Begin by climbing out of a self-stabilizing hover and correcting with a few throttle inputs a second. I find that typically I do 2-4 throttle corrections a second in high-level hovers. As in lesson 3,
practice this with more and more time in the air, starting with 5
seconds, then 10, then 15, 20, 30, and finally a minute. Once you can
hold it for a minute, try a higher hover.
This will likely be a nerve-racking experience, because unlike all previous lessons, this exercise puts your helicopter at much greater risk. Once again, however, keep the control inputs small and you will succeed. If you find you are beginning to make larger changes in throttle, then land, take a break, and try again.
Now that you can hold a hover with throttle corrections, it is time to practice changing altitude smoothly. Establish a hover about two feet above where the helicopter will self-stabilize its height. If you are able to hold the helicopter at this height, then you are ready to change height.
Begin by making the throttle increase corrections slightly less than needed to maintain height. This will slowly cause the helicopter to sink. When the helicopter is about 8 inches lower, then make the throttle increase corrections slightly more than needed to maintain height. Once the helicopter has stopped descending, resume normal corrections.
An important note is that in the absence of ground effect, such as that found in a higher-level hover, the helicopter will accelerate in the direction (either up or down) that it is traveling. For example, if you decrease the throttle so the helicopter descends from 25 feet up, by the time it is 5 feet up and beginning to encounter ground effect it will likely be going so fast that the skids smack the ground, perhaps damaging the helicopter. In essence, ground effect will not be enough to stop the fall fast enough.
Now try a bigger altitude drop from higher up. A key to success here is to think ahead, especially at higher altitudes. If you want to descend, use a small change in throttle to do so, and then begin to break the fall before arriving at your desired height. Practice, practice, practice until you have absolute control over altitude.
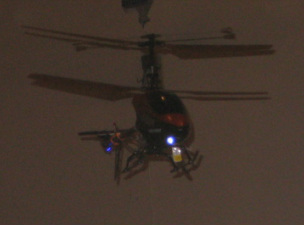
Pinprick Landings
Dead on the pavement crack.
This is the ultimate maneuver in basic helicopter flight. Aside from aerobatics, which are not available on fixed pitch and coaxial helis, this is probably the most precise maneuver a helicopter can do.
First, lay out a flat sheet of cardboard, a flat large book, or anything else less than an inch thick and wide enough to hold both main landing skids. To determine whether the landing area is sufficient, place the helicopter on the center of the "pad." Depending on how confident and adventurous you feel, make the landing area have from 10" of clearance on all sides of the skids to 3" of clearance. Most people go the safe way and start out with 10 inches.
Now establish a nice hover. For the sake of cementing altitude control learning, lets make it 5-6 feet in the air. Now move directly over your "landing pad" and maintain the hover, as in lesson 3. Slowly descend to 3 feet in the air, making sure that you are keeping the helicopter as stable as you can directly over the pad. Now descend to 2 feet, then 1 foot, all the while maintaining control. At a foot up ground effect will really be noticeable, so don't stay there for more than 5 seconds. Once you are approximately one foot off of the ground, drop the throttle relatively quickly to about 25-30% (Your helicopter shouldn't leave the ground at this throttle range). If your heli does scoot around on the ground, then decrease the throttle enough so the helicopter will stay put on the ground.
Bravo, you just made a controlled landing! Now practice again, this time landing on a smaller pad (say, with 7 or 8" of free space). Once again, start at a sufficient height, then slowly decrease throttle until you are a foot off the ground. Then drop throttle to 30% relatively quickly, but not so fast as to risk a blade strike (on coaxials, where the top rotor blades hit the bottom lower blades. This will likely only happen if you cut the throttle very fast; cutting it to 25% over a second or two on a coaxial should be fine. FP helis do not have this problem).
Keep practicing, with mastery of control with 4" of free space being proficient. If you haven't decided that you're ready to move up to a harder helicopter, then keep at it until you can land with an inch or less (if your helicopter is accurate enough!).
Level Flight
Now you want to learn how to fly in any direction without loosing altitude. Recall from control and movement that in order to move in any direction (forward, diagonal, etc) other than up and down, the rotors have to tilt (or, more accurately, the lift has to point) in that direction. With a vertical tail rotor like that on 3 channel coaxials, this is accomplished by tilting the entire helicopter body with the tail propeller, which since it is connected to the rotor shaft also causes the helicopter to tilt. With a swashplate, the lift of the blades at any point in their rotation is adjusted so that the lift is greater on the side opposite the direction of movement and less on the side in which movement is desired (click swashplate to understand it and how it enables movement in any direction).
Either way, however, a side effect is loss of overall vertical lift. With less vertical lift, such as when you are moving, the helicopter will descend in proportion to how much you are tilting. Then, when you stop moving (assuming you weren't in FF, which you shouldn't be), the helicopter's lift in the direction of movement will be turned back into vertical lift and the helicopter will rise again.
If you don't know that this is coming, it can cause you to smack the ground when you start off and then smack the ceiling when you increase throttle and stop. The key for this part of the lesson is to master the connection between movement and throttle increase and cessation of movement and throttle decrease.
Start out at about 4 feet up and move forward 10 feet at about 2-3 mph. Making use of your throttle stick, try to keep the helicopter at the same altitude throughout the whole ten feet. This will require a slight increase in throttle when you start moving and a slight decrease in throttle when you stop. Try this exercise in other directions, but always practicing keeping the helicopter at the same altitude throughout the entire exercise. Keep practicing until you can keep the altitude the same consistently, then increase your altitude and practice a bit more. If you become a master at maintaining altitude no matter what, then you will be able to do cool things (such as flying around the house without smacking into tables, chairs, etc).
Note: if you understand translational lift and FF, then you should understand that the decrease in lift with movement holds true for any speed, it is just supplemented with additional translational lift when in FF. This why when you enter FF flight you actually gain altitude rather than loose it, even though your angle of tip is greater than in slower flight (when you loose altitude whenever you move). Also, when you stop moving you will always gain lift from the main rotor(s), just when you have stopped FF the lost translational lift is greater than the gained lift from making the rotor(s) level and thus the helicopter sinks.
Final Frontier
Get ready for outdoor flight and faster forward flight! Lesson 6 up next . . .
